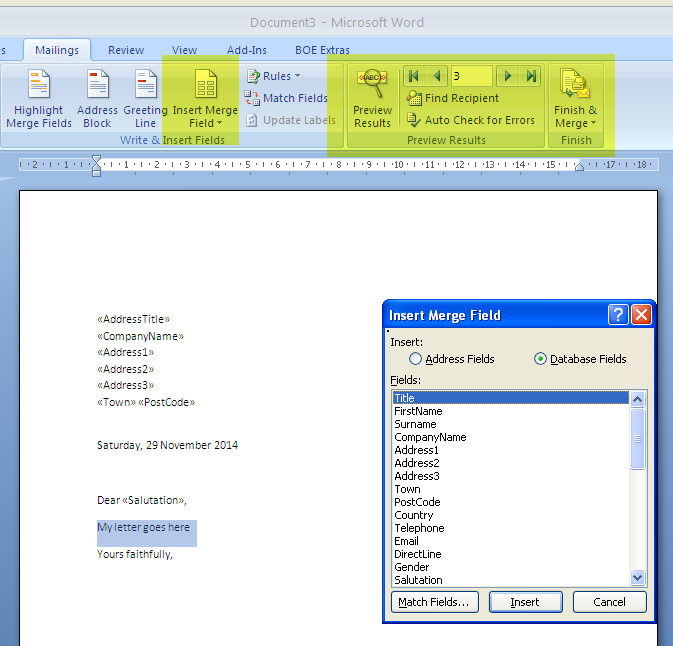
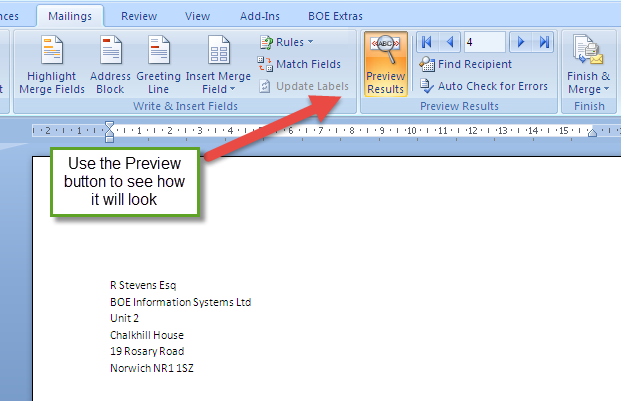
When you've got a mailshot ready to go as letters, most people will want to do this using the mail merge functionality supplied by Microsoft Word.
This is not intended to be a complete tutorial on Word mail merges, which are subject to change. If you are using an older or newer version of Word, your screens may look very different to these (taken from Word 2007). It is merely intended as a quick demonstration of how you can quickly link the mail merge data to Word and then use that capability.
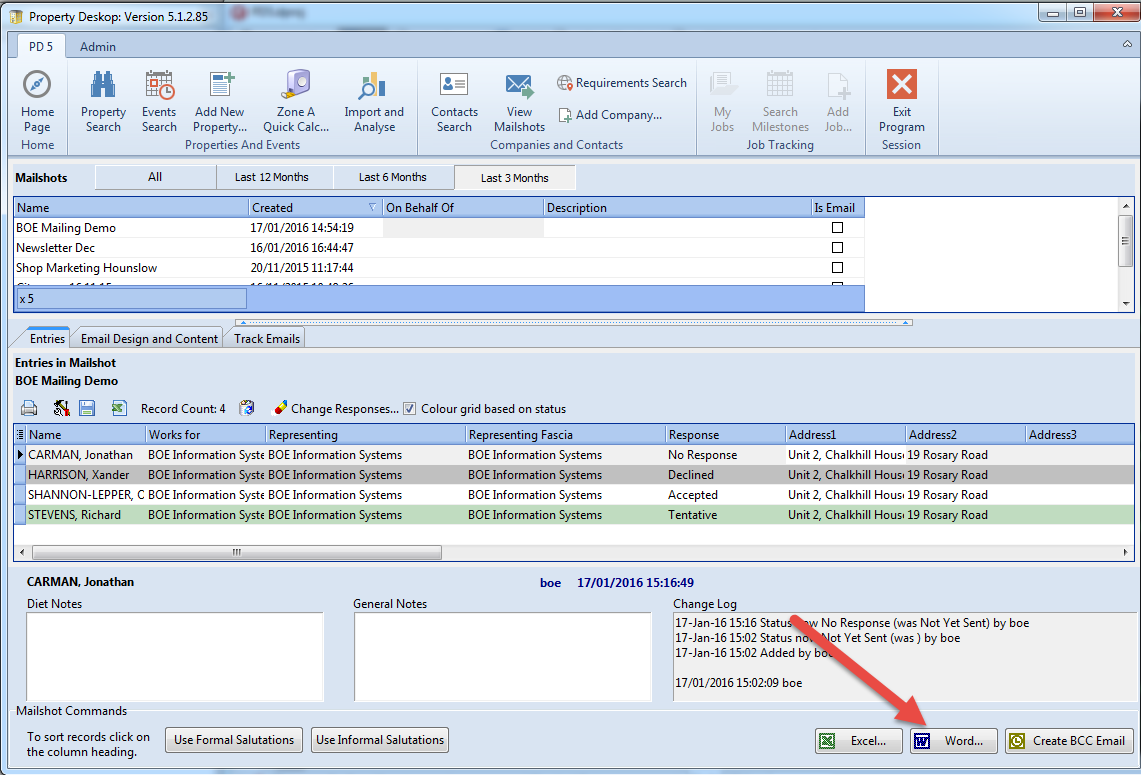
Before you start, you may wish to choose if you want formal or informal salutations in your letter, by pressing the relevant button in the lower left of the Database Mailshots screen.
Then press the "Word..." button as shown below:
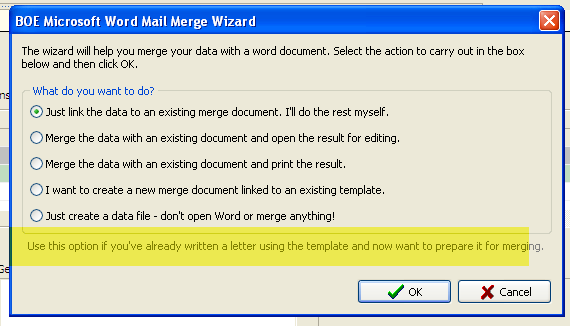
You will be offered a number of choices. The choice you make will depend on whether or not you already have a pre-set template set up, eg, one with your company logo etc in place.
(See here for more information on managing your templates.)
Assuming you do have a template (and we can supply examples to help you), the fourth choice on the list will nearly always be the one you want.
Note that as you select an option some additional explanatory text is shown to help you make your choice.
If you have selected the fourth option, you'll be shown a list of your available templates.
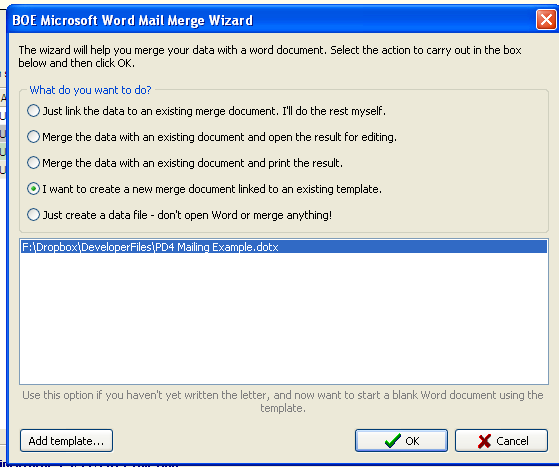
Select the one you want to use and press "OK".
This will open Word for you if it's not already open (if it is open, it may just flash on your Windows toolbar). The document will be shown in "Preview" mode with the data linked ready for merging.
You can now write your letter and then finish the mail merge in the usual way. You may also want to add additional data fields from the list, which you can do using the "Insert Merge Field" button in Word.
